Garlic is one of the most fascinating veggies to me. No other vegetable demands being put in the ground in the last moment the ground is workable in the fall, survives and even thrives underground all winter, and then pops up in the spring and starts growing like all that was no big deal.
Garlic is incredibly easy to grow. It’s not susceptible to many pests or diseases, meaning it needs basically no care while it’s growing in the spring and early summer. As long as you leave it in the ground and make sure it has some water, you’ll be set.
Your work as a garlic gardener begins when the garlic needs to be harvested. How do you know when it needs to be harvested? And do you need to do anything special to the heads of garlic once they’re harvested?
 When to Harvest Garlic
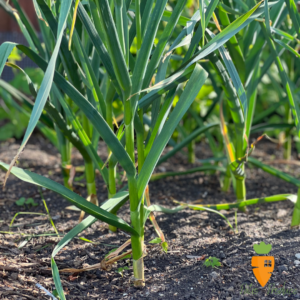
As long as the leaves of your garlic are green, it’s still growing. Let it grow. But once the bottom leaves start turning brown, get ready.
Wait until at least the bottom three rows of leaves have turned brown. Then it’s go time! This should be around late-July or early August in Chicagoland.
When you harvest your garlic, make sure you don’t just pull it out of the ground. There’s a good chance that your garlic stem will separate from your garlic bulb, which significantly shortens the time your garlic will keep during the winter (not that I know this from personal experience or anything).
I like to use a garden fork to loosen the soil near the garlic bulbs and then pull them out of the ground. You could also use a shovel to pop each garlic head out. Whatever you choose to do, just be careful to not impale any of your garlic! If you do catch one though, just make sure to use that one first in your cooking as it won’t keep over the winter.
 What to do With Garlic After You’ve Harvested it
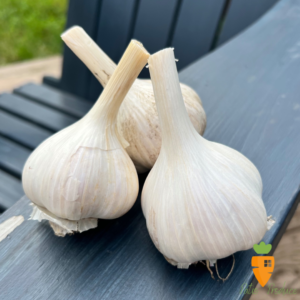
Now your goal is to help your garlic dry in a way that keeps it fresh until you’re garlic harvest next July!
Before you leave the garden with your newly-harvested garlic, brush off any dirt that you can without disturbing the white papery layers that protect the garlic. Don’t rinse them in water – your garlic needs to be kept as dry as possible.
Place your garlic, roots and stems and all, in a cool place for a few weeks to finish drying out. I usually put my garlic in my basement for this step.
After a few weeks pass, your garlic is ready for the final step! Cut the roots off the garlic and determine how you’d like to store your garlic. I like to braid the stems of my garlic and hang the braid in my basement. You could also cut the tops off your garlic and store them in a colander (the air flow will prevent your garlic from molding) in a cool place. The choice is yours!
While this can seem like a lot of work, once you’ve done it the first time it’s pretty easy. The best part is that by putting in a few minutes here and there to plant and harvest your garlic, you can easily grow all the garlic you cook with throughout the year. I haven’t bought garlic from a grocery store in years and know that you can become self-sufficient too. Happy growing!
